Category Archives: Craft

Plan to Pineapple ALL THE THINGS! Pineapple Planner Band from Loki Made It

My friend, Tara of Loki’s Lacquer, knows me well.  Specifically, she knows how crazy I am about pineapples.  And stationery.  And stationery with pineapples on it.  Did I mention pineapples?

Loki Made It pineapple planner band on my Kikki K gold planner

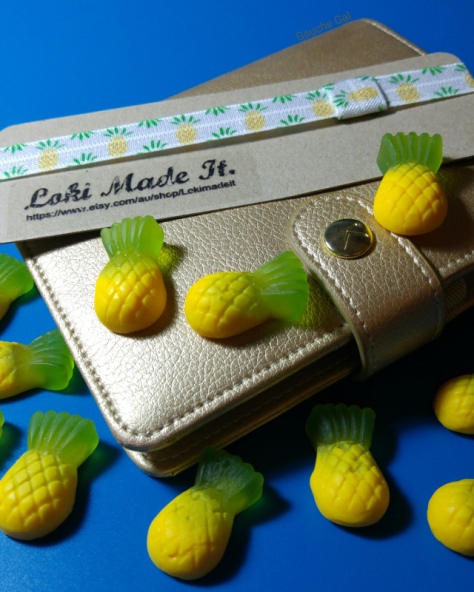
Tara has been hand-crafting some nifty little planner bands in her store Loki Made It, and gifted me one covered in pineapples to use with my small Kikki K gold planner.  Tara also sent me a jumbo stash of Allen’s Pineapple lollies and choc-coated Pineapple Lumps (not pictured because melty chocolate gets everywhere!), and even a white pineapple mani bomb from Forever Polished to try out.  Pineapples for days!

Pineapple Planner Band

The band is made from a stretchy elastic ribbon and the design is quite crisp.  It is thin, but feels sturdy and won’t bulk out your planner.  Tara hand-stitches each band before adding a loop detail.  This loop is mainly to give the band a tidy look, but you could also use it to hold a light pen or pencil.Loki Made It pineapple planner band on my Kikki K gold planner

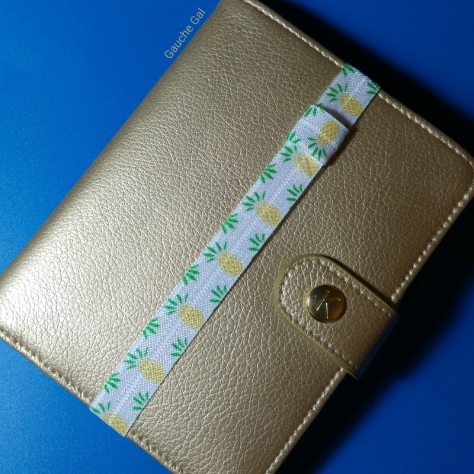
I had been using the little ruler/divider that came with my planner, flipping through to the current week using that ruler, but with the planner band on it is so much easier.  I just open up my planner and it automatically opens to the current week and is ready and waiting for me to procrastinate about!Loki Made It pineapple planner band on my Kikki K gold planner

Tara has some new goodies coming soon to Loki Made It, pictured below.  How cute is the puppy one?!

Loki Made It New Releases - Oct 2015

Do you have a planner?  Are you bare bones and minimal stickers like me, or fiercely fancy?

Awkwardly yours,

Relle

Dragon Egg :: Femme Fatale Cosmetics Planar Anomalies and Twilight Meteorite

As you might have seen, I’ve been suffering from Lack-of-Internet-Itis for the last week of my holidays.  The sudden onset of this problem left me with plenty of time to finally try out the nail polish dragon egg made from painted thumb tacks.


After lining up my thumb tacks on an old postpac box, I applied two coats of black polish to each tack.  I had the agonising decision of what colours to use, finally going with two of my neglected Femme Fatale Cosmetics namely Planar Anomalies and Twilight Meteorite.  I laid down a rough coat of Planar Anomalies to get some texture and holo glitter on my scales, then topped it off with one coat of Twilight Meteorite to give it the gorgeous purple to blue shift.  Finishing off with a good quality top coat (not fast-drying) to help prevent any chipping, I waited until they were dry before assembling the egg.
I left each coat to dry for at least half a day to 24 hours before starting the next coat to make sure everything was fully dry and would last as long as possible.  I had the fun job of sticking small sharp objects into a weirdly shaped piece of styrofoam, which was consistently shifting weight as I added more tacks.  You need to take a little bit of care when wrangling your tacks that you cover up all that pesky white, which sticks out like dog’s proverbials when using dark tacks.  I wish now that I had painted the egg with black acrylic paint first so that the gaps would be less noticeable as you turn it around.
This little egg takes up quite a bit of polish, and I would estimate I used just over a third of a bottle of Covergirl Black Diamond for the two coats of base colour.  The tacks give the egg a nice weight to it, and the texture is lovely if you’re into the tactile side of life, which I am.  (Give me a clean, warm and well-worn t-shirt to bury my face in, and I’m in heaven).
While my glittery purple dragon bumnut is not perfect, I’m really happy with how this turned out, and I’ll definitely be making another one as a gift for someone as I think they’re pretty cool.
If you are considering tackling this, make sure you leave enough space to be able to paint each tack separately.  I found I had put my tacks too close together and had some accidental polish deposits on other tacks than the one I was trying to paint.  It will also let you see whether you have properly covered the whole surface of the tack.  There were a couple of tacks that I had missed the edge of or that the coats were thin, but you can easily hide these by spinning the tack to make sure it is covered over with the next layer of tacks, but it is easily avoided if you give yourself enough room to paint.
I loosely followed the Dragon Eggs tutorial done by Accio Lacquer, as I already had a fair idea of what to do from my ghosts of crafting past, and the fact that this was not my first foray into egg/bauble-type creations.  If you haven’t attempted anything like this before, or you like to chuckle at funny gifs, definitely check out Accio’s tutorial.
I tried to find some Game of Thrones or Mother of Dragons art to share with you, however my Google searches kept bringing up a plethora of dirty-faced blondes in Daenerys  cosplay with stuffed dragons crazy-glued to their chests, and a whole lot of weird paitned naked people.  I did stumble across the above meme that made me chuckle, and I simply have to share the Pugs of Westeros video.  It’s just too cute, and pugs are awesome.
Happy Polishing!!
xo Relle

Nail Art Bangles :: Matching your accessories to your nails, not the other way round

While bored one night watching yet another criminal themed TV series (yes I’m addicted), I spied a couple of blank wooden bangles that were kicking around my desk.  I had originally bought these from Lincraft a couple of years ago, thinking I would cover them with either polymer clay, or japanese washi paper.  My procrastination was in full swing, so neither of those projects were even started.  I was however fiddling with some of my polishes including some bottles of Savina which I had picked up from Glamaco quite cheaply.

I had some polishes that fit an autumnal theme, and since it had just turned into Autumn, I decided to paint the bangles with polish. I did no special prep, just started painting.  As I was using cheap polish that I had doubles of, I wasn’t too concerned if I had to use up the whole bottle.  Surprisingly I didn’t need to.

Of course when I was done, I had to paint my nails to match!  This was only a quickie, and it satisfied my craft craving.  It also covered up those plain wooden bangles that have been taunting me for months!

The colours used were:  Coppersville, Red Earth and Sultry


Behold! My hairy arm!


xxxo Relle